Third Time is the Charm; But it Wasn’t Easy

leaving Cabo the first time on 13 May

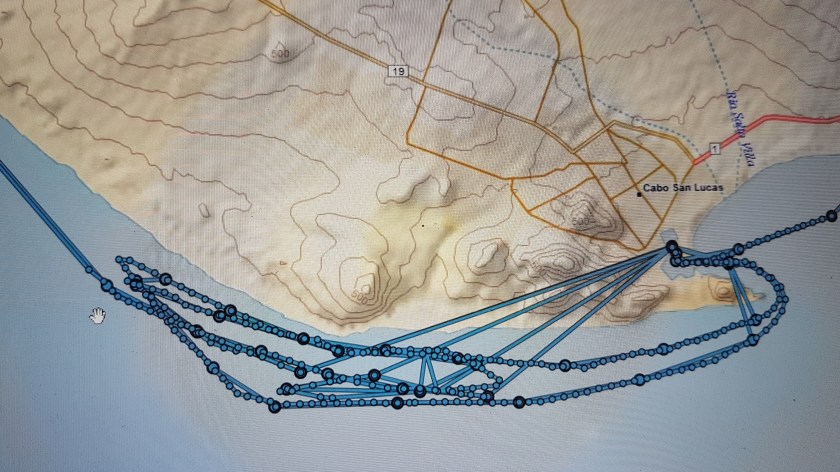
After arriving on the southern tip of Baja California May 9th, two weeks later we are faintly getting out of this tourist trap. Oh, Cabo, or better yet, Cabo Falso, has finally loosened her grip on us to to us pass.

My two previous attempts were unpleasant at best, more like miserable. And on each the previous attempts to round the cape in ferocious seas and winds, I had tried two or three times, either tacking away from shore or closer to shore to escape her grip. Each time, I dragged myself back to Cabo, tail between my legs.

On the second attempt, the autopilot also started to not act right, so I felt the failure even more.

My Octopus pump. the top screw was leaking
The screw, replacement “O” ring and broken circ clip for the Octopus pump

With thousands of boats in Cabo San Lucas, I thought it would be easy to find the little “O” ring and broken circ clip my Octopus pump needed. After walking around to numerous places in the hot sun, I found the ring, but not the clip. I called my followers who is a plethora of mechanical advice (he’s the one who told me how to make emergency hydraulic fluid in the middle of the Atlantic), who explained that the circ clip was just a stop, so the screw would not come all the way out.  It was already out, so that solved that problem. I put the new “O” ring on, leak stopped, and pump worked fine.

The Garmin InReach track for the May 13, 20 and 23.
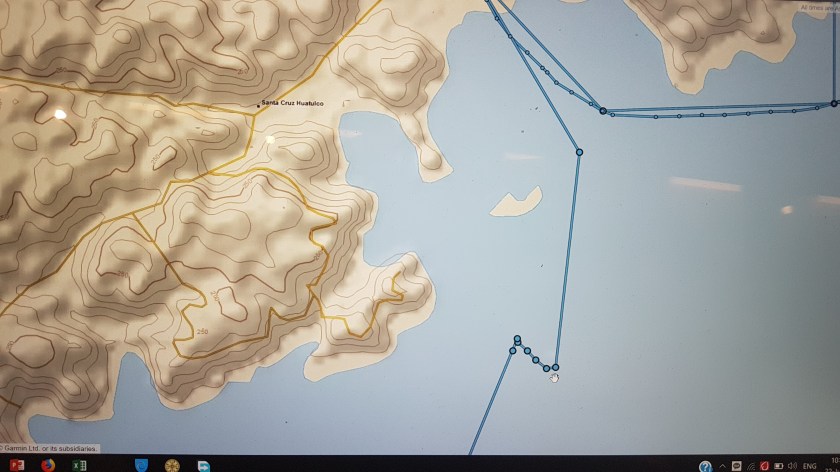
The superfluous tracks are Garmin’s way of introducing us to their world. https://share.delorme.com/dauntless

I am really in debt to Octopus Pumps. This is on the list of winter projects. I really need to have a spare.

We waited and waited. I was very conscious that every day was costing me $100+ The reality is on my budget with all the cruising I do, necessities come first, so a marina becomes a convenience. Thus, it’s the one place I really try to try to control my costs.

That I didn’t like Cabo just added insult to injury.

I make a habit to only look at Windy.com and the forecast winds once or twice a day. With crew on board, I look at it more often to make them happy, but I really don’t. The nature of forecasts is that if they change radically, they are most probably wrong. Thus, once a day will provide enough guidance. Also, while nowadays, the forecast models are run more often, at least every three hours, planet Earth still has a 24-hour day. In simplistic terms, the winds and weather are driven my differential heating caused by our day and night cycle. Therefore, running the model more often does helps, but it won’t totally cure instability issues with the forecast.

I know this is getting too complicated. Let me say this, if you are waiting for a specific weather window, like I was in Cabo, how many times have you noticed that during the day, the forecast is changing, only to return to what it said originally 24 hours later? So, looking at a forecast more than a couple times per day is simply not helpful and more often confusing. This was quite apparent as I watched the winds off the southern Baja Peninsula.

The other phenomena with numerical forecasts are the sliding weather window. I mean it shows favorable whatever in the 24 to 48-hour time frame. But the following day, the favorable whatever is still forecast to come in the 24 to 48-hour time frame. It’s like the forecast is waiting for something to happen. It is in fact; numerical models are just predictors of fluid dynamics. But something in the real world is not acting like the model suggests. Therefore, it keeps sliding the forecast.

Which is fundamentally why numerical models have not replaced weather forecasters. Weather forecasters will know the proclivity of each model for each area and time of season. Changing seasons is the biggest bugaboo for both man and machine. That’s why some months are easier or harder to forecast.

Enough weather for now.

Rounding Cabo Falso

Error
This video doesn’t exist

On 23 May 2018, we finally got underway heading to Ensenada with stops along the way. The first protected stop was Maddalena Bay, about 200 miles up the coast.

Our track on Coastal Explorer. We are finally past the point that we turned around last time.

Coming abreast of Cabo Falso, winds had picked up to 310° at 15 gusting to 25 knots. I put one bird in the water to reduce the roll, which had gotten to 10° to 15° to port, as the winds were on the forward starboard quarter. We were pitching 6° to 8° up and down. Not fun, but tolerable for a while.

Six hours after departure, we were finally around the cape and heading NNW. Winds had died down to 10 knots, but we still had an unpleasant pitching motion.

Night view of Coastal Explorer our first night out of Cabo.
You can see the pitching and rolling motions for the last 12 hours on left on bottom of screen.

During the spring and more recently in my time in Cabo, it was apparent that there are three distinct weather regimes off the Baja coast. The southern third has the strongest and most consistent NW winds. The second third has slightly more variety, while the last third, north of Tortuga Bay, must more variable weather, more like southern California.

Our Coastal Explorer chart showing our route for the previous 36 hours, after arrival in Magdalena Bay
Navionics on Tablet, further out view on Coastal Explorer, as we proceed up the channel in Magdalena Bay
Another view out the pilot house window, with Maretron and Coastal Explorer chart

Not until we were close to Magdalena bay did the winds back around to the west, though they were strong at 15 to 20 knots.

We pulled into Magdalena Bay 17:00 on the second day, the 24th, we then spent a few hours going up channel to Puerto San Carlos, to be protected from the coming wind storm.

Another view out the pilot house window, with Maretron and Coastal Explorer chart. It did stay like that the entire time

Error
This video doesn’t exist

This leg’s summary: 188 nm, 35 hours, 25 min, avg speed 5.45 knots

Now, let’s check out that dingy. If you missed that fiasco, see:

https://dauntlessatsea.com/2018/07/14/the-dingy-fiasco-part-1/


Advertisement

An Auspicious Start

Ever have those situations when the yellow/red flags are waving, and you spend all your time trying to decide if the flag is yellow or red? Instead of wondering what’s causing the flag to wave in the first place??

Our Intended Route in Red. Taking the time to get away from the coast seemed best for the forecast winds at the time.

Welcome to my world.

Brian and Mark arrived Sunday, the 29th of April. I was a bundle of nerves, due to:

  • The normal stress of starting a long trip,
  • The stress of having crew to keep happy,
  • I still had to check out of the port Monday morning,
  • Having decided to have the boat yard, do the transmission seals, they did not take credit card, so I must figure out a way to get $1000 in cash by Monday morning.

My Monday noon, all the problems were solved, and I was feeling pretty good. I had good, intrepid crew. We had food, wine and booze enough for however long a cruise the weather would allow.

With a crew of two, plus me, we had 205 gallons of fuel in the port tank, 210 in the stbd tank, 55 gallons of water in the port water tank and the stbd tank was empty (to be filled with the water maker while underway).

The track from the InReach at Share.Delorme.com/Dauntless
(If you go to that site, I do not know why the time is 12 hours off)

Engine start was at 12:25, we got underway 10 minutes later, clearing the breakwater at 12:45, on the way to either Can San Lucas, 950 miles northwest (7 days) or maybe even Ensenada, which was another 700 miles further north (another 5 days).

So, at the beginning of a 7 to 12-day passage, my sense of well-being lasted 20 minutes, or about 2 miles.

Clearing the breakwater, we set the course SSW to clear the coast before turning west, then WNW.

The bilge alarm sounded 20 minutes later, (a buzzer that

The Coastal Explorer, C-Map chart

is activated whenever the bilge pump is on), went off, and then sounded again a few minutes later. That was not normal. Thinking the stuffing box again, I left Brian at the helm, while I went to open the salon hatch to the engine room.

Stuffing box was not leaking, but I did see a pinhole leak that was spraying water from the oil heat exchanger. Umm, it’s a pinhole leak, sea water, yet the bilge pump had been on enough to pump much more water? What’s going on.

A minute later, as the engine overheat alarm sounded, it all became crystal clear. Shut down the engine, but we were less than a mile from the rocky shore.

Mark and Brian relax the night before our eventful trip

The engine coolant hose (a heater hose) from the engine to the water heater had failed at the nipple to the water heater. It has dumped all our coolant into the bilge. We were 6/10ths of a mile from shore; a very rocky shore. So, first thing I did was fill the engine coolant tank with fresh water using the garden hose the first owner had installed in the engine room just after the fresh water pump. It was good to know that I had a source of fresh water for the engine that I could use in a critical situation.

If push came to shove, I’d stick the nose nozzle in the coolant fill and turn it on, to keep water in the engine if I needed to start the engine before the repair was done.  We were in 160 feet of water, so I also had the option of dropping anchor.

Lines stored behind the fly bridge ladder

Had I had a problem that was going to take longer to fix, or if I did not have fresh water available, or if I was alone, I would have let out 200 feet of anchor and chain, knowing that the anchor would set itself as the water shallowed. This is the emergency anchoring plan I always have in the back of my head while cruising near shore. In still deeper water, with no shelf, I would combine my two anchor rodes, the secondary being 50 feet of chain and 250 feet of rode (400’ of 3/8” BBB chain on the primary with 55# Delta anchor).

I also have stored behind the salon between the upper deck ladder:

  • a 500-foot line,
  • a 250’ line,
  • a couple of 50’ lines,
  • a few shorter line,
  • the stern anchor) Bruce) and it’s 300 feet of rode on a hose reel.


These lines can all be easily retrieved and used as necessary.

Had I been alone, that’s what I would have done, while turning the boat around and heading back to the marina on auto pilot. I could have then re-fit the hose, knowing I had at least 15 minutes before I needed a course correction.

But I was not alone.

With Brian at the helm, responsible for watching our drift, Mark and I proceeded to deal with our two problems, the coolant hose and the pin hole oil cooler leak.

The coolant hose was easily dealt with. Cut off the end and reattach to nipple. I then checked for leaks, as we started the engine. No leaks, so I filled the coolant tank with ¾ gallon of coolant. This all took 10 minutes.

Next to tackle the oil cooler. We first tried a quick repair; can we stop the leak enough until our next port.  No, we couldn’t, the metal at the cap end from which it was leaking was too thin. (these were the heat exchangers that had just been supposedly checked. In addition, I’m sure this was the one that was already leaking, and I told them to keep it).

Checking the situation at the helm, while we were drifting towards shore, we were drifting very slowly and again with Brian watching, I knew we would have plenty of warning should an issue arrive. Therefore, we decided to change the oil cooler.

What a PIA. But an hour later we were all done. No leaks of oil, water, or anything.

It’s on my must do list this fall to standardize all my hydraulic and oil fittings. Thus, making it easier to replace lines or bypass the coolers if need be.

We had drifted a quarter mile closer to shore, we still had a third of a mile to spare. Easy Peasy as Micah would say.

Knowing we could return to the marina easily, reduced the stress of this repair. It wasn’t “fix, or else” like it may have been in the middle of the Atlantic, like with my imaginary fuel leak.

At 14:10 we were underway again.

My peace of mind now lasted one minute.

The autopilot was not working. It thought it was working, but it wouldn’t steer correctly.

Back to the rear of the engine room, I looked at my Octopus pump, it looked ok, no major leaks, then I saw the three valves which control fluid to the pump, allowing me to change pump without draining all the hydraulic fluid from the system, were closed.

Oops.  At least that was easy.

A minute later, we were underway again, hopefully to Cabo San Lucas.

This time my peace of mind lasted a whole two hours.


Phase I is Done

Dauntless after her second coat of primer

Phase I was doing he stuff that had to be done before Dauntless got her feet wet.  All done except for salt water pump.  For a competent person, this is a few days work; for me about three weeks.

  • Forward Bilge
    1. Complete hookup of New Vetus holding tank, with new fittings and electrical
    2. Install new bilge pump (old one becomes spare) with new check valve
    3. Make additional fresh water hookup and run hose to forward compartment for Raritan Purisan
    4. Check connections for salt water pump (new, hasn’t worked since installed)
    5. We found a bare wall bulkhead in front of old holding tank. Gary sealed it and put Gelcoat on it.
    6. Check all clamps for the multitude of thru hulls in this area
  • Anchor Locker
    1. Pull all the chain and rode out for both anchors
    2. Vacuum the bottom of chain locker
    3. Replace two deck fittings for fresh & salt water connections
    4. Re-mark and reverse anchor chain
    5. Add 90 feet polypropylene to end of chain rode (this is because it floats, making it easier to find should I have to abandon anchor with no time for anything else)
    6. Paint anchors
    7. Find third anchor for stern
    8. Make up a new, longer chain snubber

The Electrical list is untouched, but the first four items a-d, will be done in the next days.  The rest in the next two months.

  • Run new VHF cable to the two radios
  • Replace plugs for Navigation lights
  • Add Name Board lights
  • Install new Driving lights
  • Add USB ports in salon and second cabin
  • Add new switch and breaker panel for fridge/freezer in pilot house
  • Add switch panel for solar panels

Once D is out of the shed we will be able to re-rig the Paravanes and the mast.  Gary’s carpenter has made another bird that got broken in the North Sea and has repaired the doors.  The Rocker Stoppers are a work in progress.

  • Restring birds to new line, 3/16” Amsteel, so that I can modify the depth of the birds.
  • Boat Yard is making rocker stoppers for me to use while at anchor

For the Wood Trim, I can’t oil anything until all the sanding is done. I will do this next week, before we head out of the shed into the hard, cruel world.

  • Teak “eyebrow” around pilot house has been scrapped and sanded thanks to Leonie & Martin. I will put Tung Oil on it and see how that works.
  • Oil all the benches that have been sanded

Fuel tank is in the final stages of being done.  Sealant has been applied and new inspection ports are ready to be installed. Anti-Foul will be applied the last day, next Friday.

Most of the heavy lifting by Gary and the New Ross Boat Yard are done or will be in the next week:

  • Port fuel tank sealant and new inspection ports
  • New bottom job, with two coats of epoxy and one of a tie-coat
  • New anti-foul by International, a semi-hard coating that is made for slow boats like Dauntless and should last at least a few years.
  • Painting of the hull from the cap rails down, including the bow pulpit
  • Fixing on of the side doors that while latched open this past winter the winds ripped if off the hook and broke the entire frame. (winds this winter were higher than 100 knots or 110 mph.
  • New Bow thruster blades

Getting the forward cabin and compartments fixed, cleaned and put away was the big monkey on my back.  It was critical to get done and as long as it was unfinished the boat was unlivable.

I’ll start sleeping on board Friday.  It’s feeling like my home again.

My first glass of wine on Dauntless since October.
My first glass of wine on Dauntless since October. And looking forward to forward cabin.

Gary is just finishing applying the second primer coat.  That will get sanded tomorrow, then washed again with an Awlgrip wash (a solvent, like paint thinner) before the first finish coat goes on.  At that point we will actually see the final color.  I hope I like it!

I literally had my first glass of wine on board, the first since October (I’ve had wine, not just in a glass!). I do have rituals you know.

P.S.  Here is a bonus video of Gary applying the second primer coat today. ( I don’t post many videos because it takes hours to upload one video sucessfullly.)

Error
This video doesn’t exist

Two Inside Projects on Dauntless, Part 1

This winter has been the first real refit since we bought Dauntless three years ago.  When we bought this Krogen 42, she was in great shape, in fact the best shape of the 8 KK 42’s I looked at.  She had the lowest engine hours, only 1650, and some features we wanted: dual heads, four windows in the rear salon and no built-in furniture in the salon.  The Flexsteel leather furniture that the previous owner had gotten for the boat was like new.  The nicest leather we had ever felt.  We talked about that leather for two years before we actually were in a position to get D.

Middle top is fuel intake. behind it with the rust pattern underneath is the fuel vent.

But with this little use, comes issues that are a result of that little use.

The port side fuel tank started leaking this past summer.  It was coming from the forward inboard seam. On opening up the inspection port, it had a lot of rust.  More rust than I had seen in the starboard tank.

Now since I had had the boat, I’d had problems with water getting into the tank.  During the last days of my Atlantic Passage, this became a critical problem that had me changing or emptying fuel filters every few hours.  You can read those details here: Dauntless-crosses-the-north-atlantic-the-post-mortem

Last summer in Holland, with the help of Marinus, another Krogen owner, I finally figured out the source of the water was the stink’in fuel vent.  In one of the few poor decisions Kadey Krogen made in the design of this boat, the fuel vent was under the rub rail.  As the Krogen rolls its way across the Atlantic this became an issue when I was in very big seas and the stabilizers were not working as well as they should for reasons related to operator (ME) error.

To fix the tank issues, we decided to add three more larger inspection ports. This will allow the two-part epoxy sealant to be applied.

the rust pattern underneath is the fuel vent.

Looking at the pictures of the opened tank, one can see the rust pattern from the water getting into the vent.

Also, when I had purposely overfilled this tank by about 10 gallons, in part to see what would happen, I had the unpleasant surprise to see fuel leaking out of the tank into the bilge.  It was not apparent where this fuel was coming from. This picture shows the fitting itself was poorly installed and the screws used rusted and basically left small holes for fuel to get out or even rain water that was on top of the tank to get in.

From the amount of rust, this tank was not sued for quite some time, years, but left with some water.  Once I got the boat, this tank had been the problem child, therefore I had a tendency not to use it as much, which ended up exacerbating the problem.

Fuel tank today after cleaning

Here are some before pictures.  The after pictures will come when done.

Dauntless Gets a New Bottom Job

In October when we pulled her from the water, we found both old and new damage.

That long repair is the result of the second rock.

The new was from my second rock encounter in Finland.  In the first Finnish rock meeting, Dauntless rode up the rock on her keel.

But the second one was more egregious in that I hit the side of the rock with the side of the hull that left a four-foot scrape in the hull which was deep enough to cause a hairline crack all the way through the hull. Me Bad.

So in looking to repair that damage, we also

Her Starboard Side
Her Starboard Side

found some old damage that had been repaired, but not well or not completely.  How do I know?  Because in the three years I have owned her, whenever it rained, I had water entering the forward bilge.  In addition, the paint on the bulkhead that separates the forward bilge from the amidships, had peeled, since water was coming in behind it.

Both those issues have been repaired and even though Dauntless sat on the hard in the wind and rain all winter, only in the last days was she put into the shed for painting, the forward bilge has remained bone dry.

Dauntless in the Shed. The Shed looked much bigger before she went it.

Now, the engine room bilge still has rain water getting in there, but I actually think that is as normal as one can expect in a 25-year-old boat.

I am also very pleased that everyone who has worked on the Krogen for the last 6 months has commented on the quality of: the workmanship, the design and the build.

I decided to paint the entire hull, since three years of docking was starting to show.  And the incentive of a new, different for a Kadey Krogen, paint job will make me both more careful and thoughtful.

In the next weeks, I will enumerate the other jobs we, I have done for this coming season.  That we have many, many miles to go, makes me feel even better about the preparation we are doing now.

The pictures show Dauntless outside when they had finished the bottom rehab, which meant repairing all the nicks and gouges, new fiberglass along the keel, gel-coat along the keel, then preparing the hull for two coats of epoxy and one of the tie-coat, which allows the anti-foul to adhere to the epoxy.

After two layers of Epoxy
After two layers of epoxy, the beginning of the tiecoat (that allows the anti-foul coat to bond to the epoxy) is going on.
Gary applying the first layer of epoxy
Keel got a new layer of gelcoat.