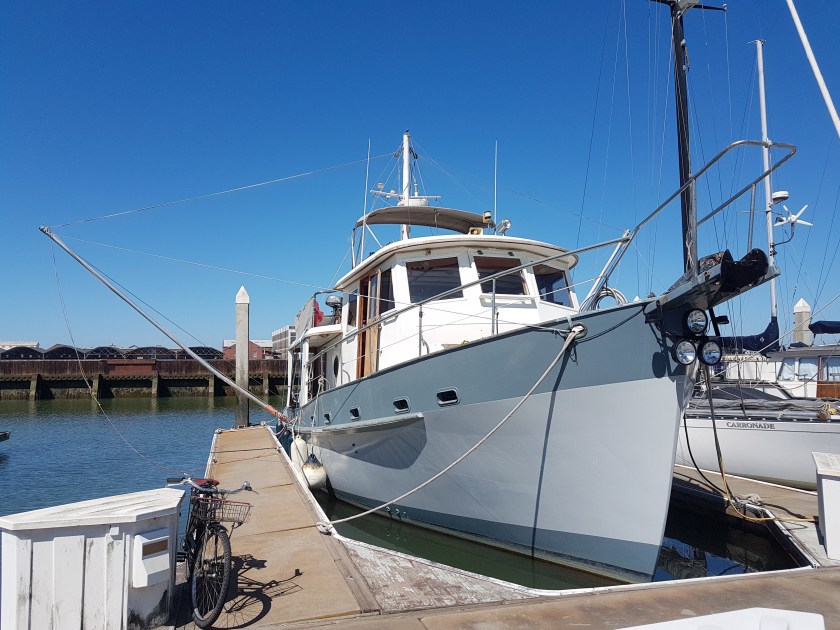
Just finished checking the rigging for the paravane pole and bird.
I’ve been ready to leave Vallejo for a month now. This is getting old. But I have vowed not to let myself be beat up any ore than usual.
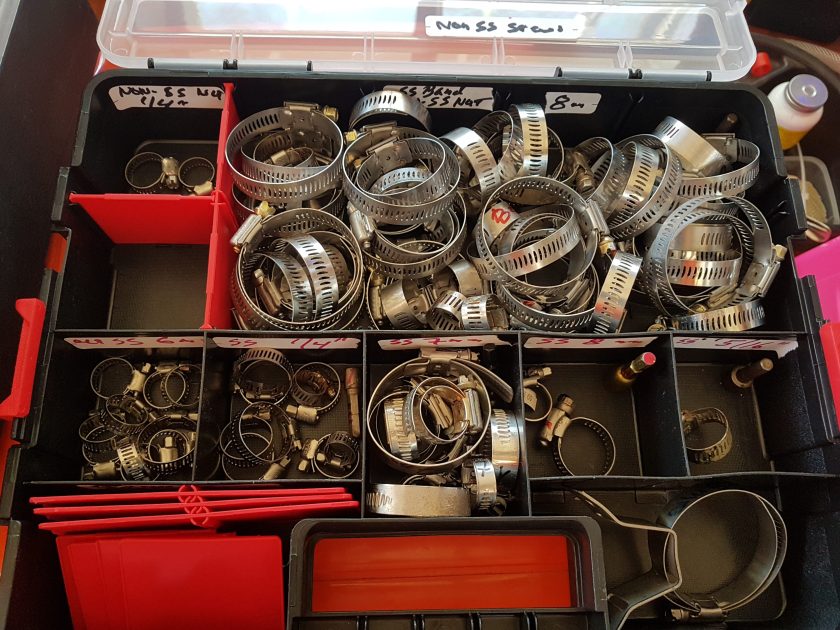
I spent much of last week organizing parts. I thought I had only two types of hose clamps, stainless and non stainless, which I separated last year. If only life would be so easy.
As you can see from the attached picture, I have essentially 7 different stainless-steel hose clamps and guess what, that large bunch in the back of the organizer all have stainless bands, but non stainless screws! That’s totally worthless. I wish I could be sure that that bunch was not Made in America!
My 7 types of hose clamps
And they are also organized now by the size of the screw: 5mm, ¼”, 6mm, 7mm, 8mm. this allows me to easily use the same size for any particular job, as opposed to discovering that the dual clamped sanitary hoses have two different sizes of nuts.
I’m now doing things that were not on the list, like measuring the paravane bird rigging. When we left Martinique, 5,000 miles ago, I had the birds set to run 19 feet below the water surface. that’s 5 feet deeper than previously, as I finally realized that in larger seas, waves greater than 10 feet, the bird itself was being picked up in the rotor of the wave, negating much of its effect.
Stbd paravane pole with double loop proving a quick extra 10 feet of depth should conditions require it.
Since Martinique all has been good on that front. Now, I made sure of the depth and also marked the poles. In addition, I re-rigged the extra line, so that I can quickly run then 10 feet deeper if the situation, really large seas, warrant it, without stopping or even slowing down. With the re-rigging, I just have to take out a few clove hitches and the extra 10 feet is free.
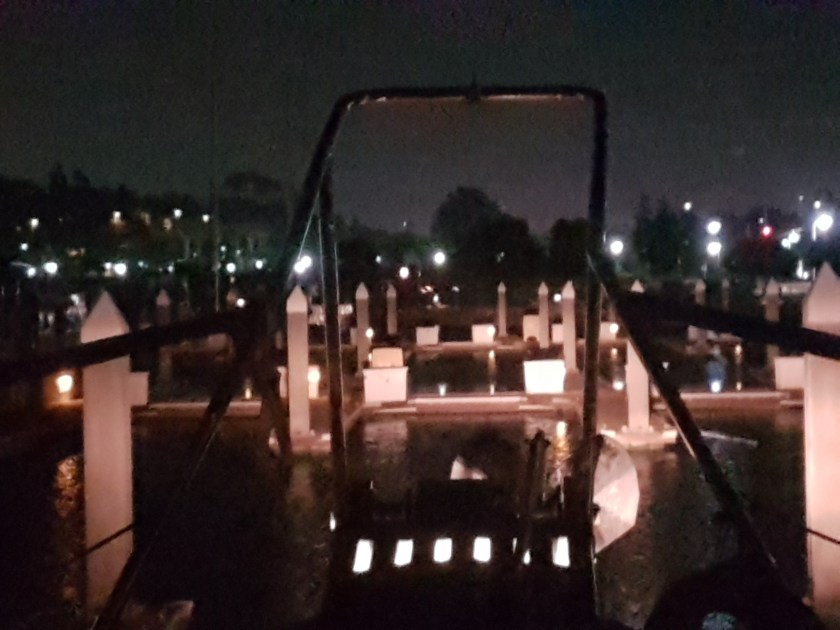
Here is also a before and after picture of the driving lights. They are handy when anchoring in strange spots with other boats or mooring buoys around. I’ve also used them in dark, narrow, lonely channels. T
here have been a few too many of those.
My long term filter carton is a bit depleted. I have already taken out my last 6 Racor 2010 filters. I keep them in the engine room by the Racors.. I have only half a dozen Racor 2050 filters left for my fuel polisher, as well as a number of engine mounted filters, along with some water sediment filters for the water maker.Driving lights off
Driving lights on. I only use them for anchoring in unknown places or in narrow, but marked channels.
Last week I returned to Dauntless, but then took a 5-day trip to Anchorage to attend a teaching job fair. I figure as long as I will be in the USA for the foreseeable future, I may as well work again and put my winter time to constructive use and replenish the coffers.
I spent much of the winter thinking of what had to be done on Dauntless. Since leaving Ireland two and a half years ago, I’ve asked for a lot from my little Kadey Krogen, but gave her only fuel and oil in return.
But 30 months, 10,000+ miles, 2100 engine hours later, the poor girl needs some TLC. While I revised and improved things like the paravane stabilizers as time went on, some other things, like my solar panels, were ignored, though I knew I needed to change the wiring from the controllers.
I also didn’t need to, but thought it was time to change the location of my fresh water tank selector. Too many times, I’ve had to sneak into the occupied second cabin in the middle of the night, open the closet, pull up the floor board and change the water tank so I could take a shower. Since I’m working with water, I may as well also, change the selector valve for the water maker output.
It’s hard to see, but the re-charge fitting is at the very tip against the insulation for the copper tube.
So, I have a list of about a dozen improvements and corrections (to some older half-assed jobs of mine) to do. Plus, the normal stuff of putting away the clothes and accouterments of a “normal” life after merging a couple of households. Now, where to put those dozen suits?
I’d also come up with a plan as to not to waste money. I cook very well and like my cooking. I often eat out only because I like getting out, not because the food is better. In fact, often it’s not, yet expensive.
Day 1 of 60 days, the next two months, on my first free day, with the rental car that I’d picked up in Sacramento Airport the night before, and which had to be returned by 18:00 here in Vallejo, I would do my shopping at Costco to set me up for the next two months.
All goes according to plan, with only a little warning flag. The freezer only got down to 20°F in the first 18 hours. Usually, it is minus 5°. Did it just need more time, I wished and hoped?
You all know that hope. The hope that is not based on any reason or even history. It’s just a hope that you don’t have to deal with it
So of course, on Day 2 of 60, instead of starting my dozens of projects I’d planned, I’m dealing with stuff that isn’t even on the list.
Freezer temperature is still too high. My Costco ice cream is more like a slurpy. First thing I did was to look online for solutions. Not hard, and in fact, on Cruiser’s Forum, there was a really well written story of re-charging the Freon in (my) BD50F Danfoss compressor. Not so hard, just finding a coupling fitting will be a PIA.
I check out the re-charge fitting and I notice the first fly in the ointment. I’ll have to move the entire compressor to get at the re-charge fitting, as it’s tucked up against the insulated copper tube for the refrigerant.
My compressor is behind the freezer, under the pilot house settee. Getting to the securing screws require an agility I never had. Yet again one of those situations in which a trained monkey would be very valuable.
By noon, the compressor is moved enough to start phase 2. Finding Freon.
Taking my new acquired $60 bicycle, it was only 10 minutes to the NAPA store. Sure enough, they have Freon, but not the hoses or fittings to connect it. I buy a can in any case. (Why you wonder, without the hose??)
Then, as I am walking out the door, I realize that I still need the hoses and connectors, so I may as well go to the nearby Autozone. Said Autozone was much better equipped than the NAPA and not only are their prices lower, they have a number of options with Freon and hose together. I still needed an adapter hose to connect the car sized fitting to my bicycle style fitting used on the Danfoss compressors.
The Freon I found
They had something that may work, so I get that too, promising not to hurt the packaging so I can return it if need be.
Decide I may as well, return the Freon I got at NAPA. Apologize for that.
Get back to the boat and get ready to get to work.
As I am gently moving the compressor, trying not to make a small problem into a much bigger one by rupturing a coolant tube, I notice that the muffin fan that sits between the compressor and the radiator is not turning. I stick my finger in it to make sure and it’s still not turning.
Well, that will teach me to diagnose the problem on the internet.
Yes, Freon may still be an issue, but before I do anything, I need to get the fan working. There is no way I can take the old fan out without moving the entire compressor to a more assessable location.
But guess what? I have muffin fans! At least three or four!! Why? You wonder? Because back in the day, year one (as Asians would count it), the muffin fan went out in my inverter. The inverter overheats and shuts off pretty soon without the fan.
My job complete, The bottom back of the freezer is on the right
I bought 4 muffin fans online, they were advertised as being very quiet and would last forever. Spares are good. Of course, par for the course, once I took the old muffin fan out of the inverter, I realized the fan rotor had just fallen out of its housing. I just needed to glue it and put it back. It’s worked the last 5 years without a hitch. Though of course, noting is that easy. I cut the wires very short when I pulled it out, so of course, it took half a day to reconnect them.
But now, when I really needed one, I had muffin fans to spare.
I installed it on the opposite side of the radiator, so that it blows thru the radiator, the defunct fan and the compressor. I hooked it up to an external 12v power because before I went to the trouble of hooking it up normally, I wanted to make sure it was the solution to the problem.
Within hours the temperature of the freezer was down to zero. By morning, it was -5°.
I was good to go.
Now, at the end of Day 3 of 60, my to-do list is the same as ever and Alaska is no closer.
Since my first car days, driving around Mt. Rainier in the middle of the night, I have loved having extra lights on my car, driving lights. No video games, no internet, we didn’t pretend life, we lived life.
The New lights in Scotland in 2016. On the outside of the frame, you can make out the fog lights which are point down to illuminate the hull and anchor chain.
Fast forward 40 years and during my first year with Dauntless, I somehow found myself, cruising the ICW at night, a few times too many. Cruising at night in marked channels is so much harder than cruising on the open ocean. There are frequent course changes, by the minute or even necessitating hand steering. I soon found that that the spot light on Dauntless, mounted on top, forward of the pilot house, did little more than light up the foredeck, thus killing whatever night vision I had.
I found it more effective to stand outside, either in the dark or using a handheld LED flashlight. But when cruising alone, it’s difficult to be both outside the pilot house and steer the boat. The solution, a driving light. They also come in very handy when looking for an anchorage or mooring spot, with other small boats, like a dingy, that may not show up on the radar.
My first driving light for Dauntless was a large Hella (made in Germany) that I hung under the bow pulpit. I was worried about the anchor hitting it as it swung into place, but that turned out not to be a problem.
It got all the way to Ireland and on the second day in Ireland, as we were re-positioning the boat, rafting her to a fishing boat by hand power alone, we managed to punch the lens of the light out, with the anchor of the nearby boat. The light still functioned, so I left it.
Lucky for me, because 11 months later, as I was cruising up a very narrow channel in southern Sweden, looking for an appropriate place to anchor after an exhausting day, that light saved my bacon.
The channel of “deep” water was only about 8 feet deep and Dauntless needed almost 5 of those feet. But the channel was only about 40 feet wide and outside the channel was only three feet. I had already hit two rocks while in Finland. This was not the soft mud of the Eastern U.S. or even the southern Baltic, this was the jagged rocks of Scandinavia (similar to Maine, as they are related geologically).
Two years later
I was terrified. In large part because the channel was marked with non-reflective buoys that were spaced too far apart. In other words, as I passed one buoy, I could not see the next one more than half a mile away. Then I thought to turn on my driving light.
It wasn’t exactly like the sun coming up, but it put enough light down range to pick out the marker buoys. My task became easy and 30 minutes later, I was at the spot on the chart that had deep water off channel, so I could anchor and get some much-needed sleep.
Two years later, the lights are being held on with rust
My driving light was not going to last with a broken lens, letting water get into the housing. Earlier in the year, I had discovered that the replacement lens, was almost as much as the entire light, almost $100. In Sweden, more than half the cars have some sort of auxiliary driving lights. Why? Because it’s dark and for Europe there are a lot of big animals, mostly European Moose, (smaller than the North American version) on the road at night.
I found three large lights for $100. Later in Ireland, I got a few more of those Amazon LED fog lights (5” diameter). Link My Amazon Fog lights
(These lights look like an even better deal for 10 lights, An even better deal
Originally, I also had two 4″ fog (diffuse lens) facing forward. But they turned out to be only marginally effective. Also, during the same trip, I had to anchor just off the channel in Northern Ireland. I left the spreader lights on for increased visibility and I turned the forward fog lights down to illuminate the hull (they only consume 4.5 amps/hr). I then realized they illuminated the anchor chain well as I was hauling anchor. So I left that way ever since.
All these lights are made for vehicles and thus are waterproof, but the weak point are the brackets. They are mild steel and rust quickly. So, one of my winter projects was to replace those brackets with stainless steel.
I realized Vietnam does so much in stainless steel. Every household has numerous items made from stainless steel: kitchen racks, shelves, shoe and coat stands, etc. Therefore, this was the place to have it done.
Ideally, aluminum would be better, since the housing of the lights is aluminum, but that’s more expensive and the Vietnam market couldn’t sustain it. For the same reason, the stainless steel is to specification 304, not the more salt-water corrosion resistant, 316.
My new stainless steel frame and light brackets with the diagram I gave the fabricator.
The language barrier can also be formidable. In my neighborhood, virtually no one speaks English. The stainless shop I found last year did not. But that means the translator, must understand the concepts that are being translated and understand my diagram I drew for the two types of brackets and the frame I wanted made. Trinh was up to the task and two days later, we got a call, saying my brackets were ready.
The frame cost $31, each bracket $3.50.
I’ll be back to Dauntless in mid-March, getting her ready to move north later in the spring and southeast Alaska this summer.
If nothing else, I’ll be able to better see in the dark.